Keeping your data backed up takes time, planning and commitment. But most of us put it off until it’s too late. Having a good backup policy for your computer is essential to keeping your digital life safe. Her’s how you can automate you backups for Free using EaseUS Todo Backup
Automate you Backups for Free using EaseUS Todo Backup
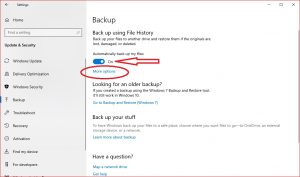
In this tutorial we’ll discuss how to create an automatic backup for free using EaseUS Todo Backup Free software. Windows 10 also has a backup feature. If you are interested in that option then you should take a look at this article.
What you will need:
- You’ll need a hard drive to store your backups on. An external hard drive is recommended so that it can be removed easily and stored in a safe place. You can use an internal hard drive as well but be warned that if your PC is in some way damaged physically (dropped, catches fire, etc.) then your backed-up data will be gone as well. Best practice is to keep your backed-up data in a separate location to your computer.
- EaseUS Todo Backup Free software, which you can download here.
Note that the free version of this software is for home use. The paid version, EaseUSTodo Backup, offers a multitude of license types to suit everyone, from the home user, business server, a technician’s edition and even a Mac version.
Step 1
Head over to EaseUS Todo Backup Free. You’ll need to provide an email address in order to download the free software. Install the software by double clicking on the downloaded file. Select your language and run through the installation procedure as normal. For this article we will use the Free version, but for more advanced features, you might prefer upgrading to the Home Edition. Accept the terms and conditions (if you agree to them) and click next to accept the location of the installation files.

Step 2
The next window requests confirmation of the location of where you want to save your backups. This can be changed later, so simply click next here.

Step 3
Once the program has installed, click finish.

Step 4
At the next screen, select Later to use the free version, or if you want to purchase the the advances version, select Buy Now.

Step 5
In the blue strip on the left, select the sandwich icon at the top to expand the menu.

Step 6
Here’s an explanation of what options are available:
- Disk/Partition Backup – This options will backup only a certain partition (section) of your hard drive.
- System Backup – This will back up what ever Operating System you have running on your computer.
- File Backup – This will backup certain files and folders (that you choose).
- Email Backup – This will backup your email accounts and settings. This is only available in the paid version.
- Smart Backup – This is a simplified option that backs up what the software believes to be the most important data.
We’ll be using the File Backup options. Go ahead and select it.

Step 7
There are a number of options you need to select. Let’s start with the actual files you want to back up. On the left you can navigate through the folders and select the ones you want to backup but clicking on them.

Step 8
Make sure that the “Users” account has been selected as this is where most of your personal data is stored. This can usually be found under Computer –> C: –> Users. This will back up the data in the following locations: desktop, downloads, pictures, documents, videos, music, favorites, MS contacts, etc. Select any other folder you might want to include in your backup.

Step 9
Now select the browse button so you can set the destination hard drive of where you are going to save the backup to.

Step 10
Now select the hard drive where you want to save the backup. I’m selecting Media (D:).

Step 12
Now select the Schedule settings as indicated below

Schedule Type indicates the backup scheduling. I am going to set a backup twice a day at 8.30am and 4.30pm.
- First I set the the schedule to Daily
- Second, I set first time for the backup
- Then I click the + button to add a second time
- If you want to add more times to perform a backup, click on the + button and type in the time
- I’m selecting the Incremental Backup Method.
Notes about Backup Method:
– The first backup is always a full backup.
– If you select Full: Every backup after the first one will be another full backup file saved as an image file. This is the most reliable method but can take up a lot of space.– If you select Differential: Only data that has been changed or added since the last backup will be saved to the backup file.*
– If you select Incremental: Only data that has been changed or added since the first full backup will be saved to the backup file.*
Select which ever one best suits your needs. The most reliable option would be Full, followed by Incremental, then thirdly would be Differential.

Checking the Appoint Daily First Backup will ensure that the first backup on each day will be with a Full, Incremental or Differential.
The other options are self explanatory. Select them as you so desire. When you are finish, click the save button.
Step 13
- You can type in a name for your backup plan.
- Add a description.
- The Image-Reserve Strategy determines how long the backup will be stored for. Don’t enable this if you want the backup files that will never be copied over.
- Finally, the Backup Options relate to more advanced settings such as Encryption and Performance. Feel free to poke around but it’s default settings are perfectly fine for most users.
- Click Save when you are done.

Review you backup settings
- Pause your backups so no further backup will be made
- Recover you backups when needed
- Starts the backup process manually
- Here you can edit the backup plan you’ve just created, delete previous backup images and check the backup image files for problems.

And that’s how you automate you backups for free using EaseUS Todo Backup.
You are ready to go. Your backup will start at the next scheduled time. If you computer is off at that time, a backup will be performed when you next start your computer (unless you selected to have your computer start up to perform the backup).
Remember to have your external hard drive plugged in (if you are using an external drive), otherwise no backups will take place.
Restoring
EaseUS Todo Backup creates an image file when a backup is performed. If you ever need to restore any of the data, you’ll need to load EaseUS Todo Backup and use the restore options through the software. You won’t be able to view any of the backed up content in a windows explorer window.
If you used this method, feel free to leave a comment and let me know how your backup went.
Special thanks*
Special thanks to Mike White in San Diego for assisting us in deciphering the difference between “Differential” and “Incremental” backup options.